A Journey into Natural Bread Baking
One of the reasons behind this experiment was to see how easy or difficult it is to make delicious homemade sourdough bread without any preservatives or additives. I was shocked when I bought what seemed to be a healthy loaf from the bakery, only to find that it contained around ten ingredients, including milk and cocoa—two things I never expected in a rye bread! That got me thinking: could I make my own wholesome, natural sourdough bread with just a few simple ingredients? And so, my homemade sourdough bread recipe journey began.
The Inspiration
For the past couple of weeks, my social media feeds have been flooded with reels about sourdough starters and homemade sourdough bread recipes. Something about it piqued my curiosity, and I decided to take on the challenge of developing my own starter and baking my own sourdough loaves. Without any prior knowledge, I dove headfirst into the world of fermentation and wild yeast cultivation.
The Starter: A Test of Patience
I knew that creating a sourdough starter would take about a week before it could be used for baking, so I had some time to do my research. I spent hours watching YouTube videos, reading comments, and absorbing as much knowledge as I could. By day six, my starter more than doubled in size within three hours of feeding, which was a good sign that it was ready.
To confirm, I performed the classic float test—dropping a small piece of starter in water. If it floats, it means the starter is strong enough to leaven bread. To give my starter the best chance of success, I followed the method outlined in this video step by step.
The First Bake
Since I had to spend the night at my parents’ place, I decided to take one loaf with me and bake it there, while leaving the second loaf in my fridge overnight. The first loaf turned out surprisingly well—I was expecting something dense or underbaked, but it actually looked and tasted decent. That made me even more excited to see how the second loaf would turn out.
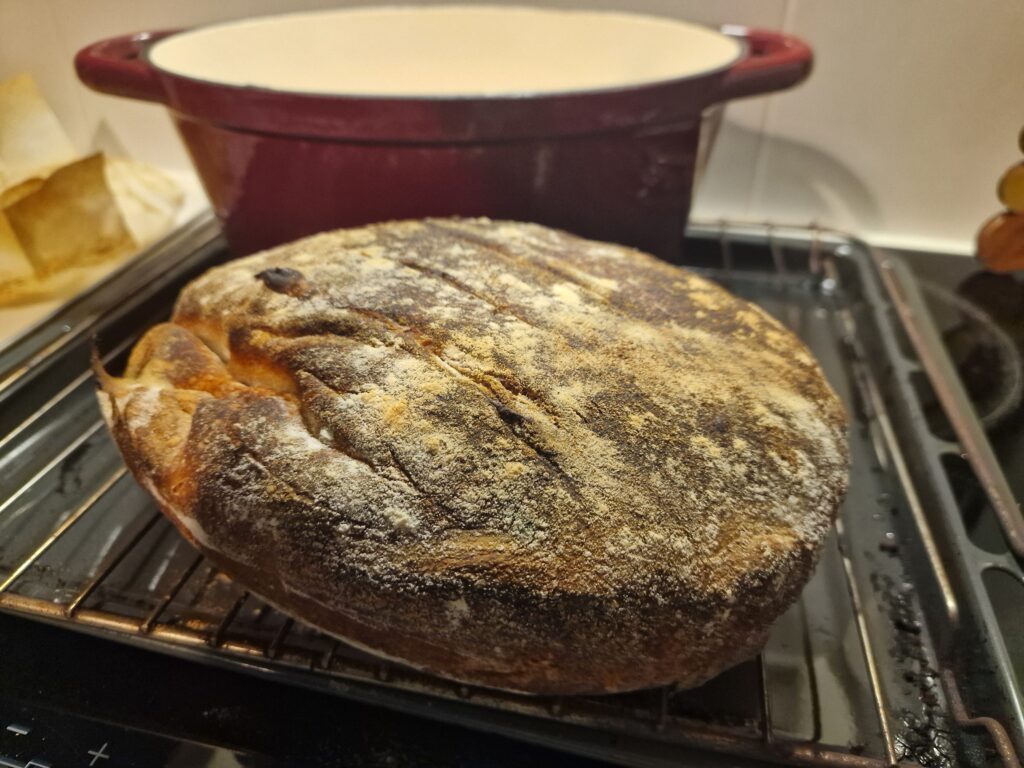
When I returned home, I baked the second loaf using my brand-new cast iron oven. I preheated it to 250°C and baked the homemade sourdough bread for 20 minutes with the lid on, followed by another 30 minutes with the lid off. I knew a properly baked loaf should sound hollow when tapped on the bottom and should feel light in weight.
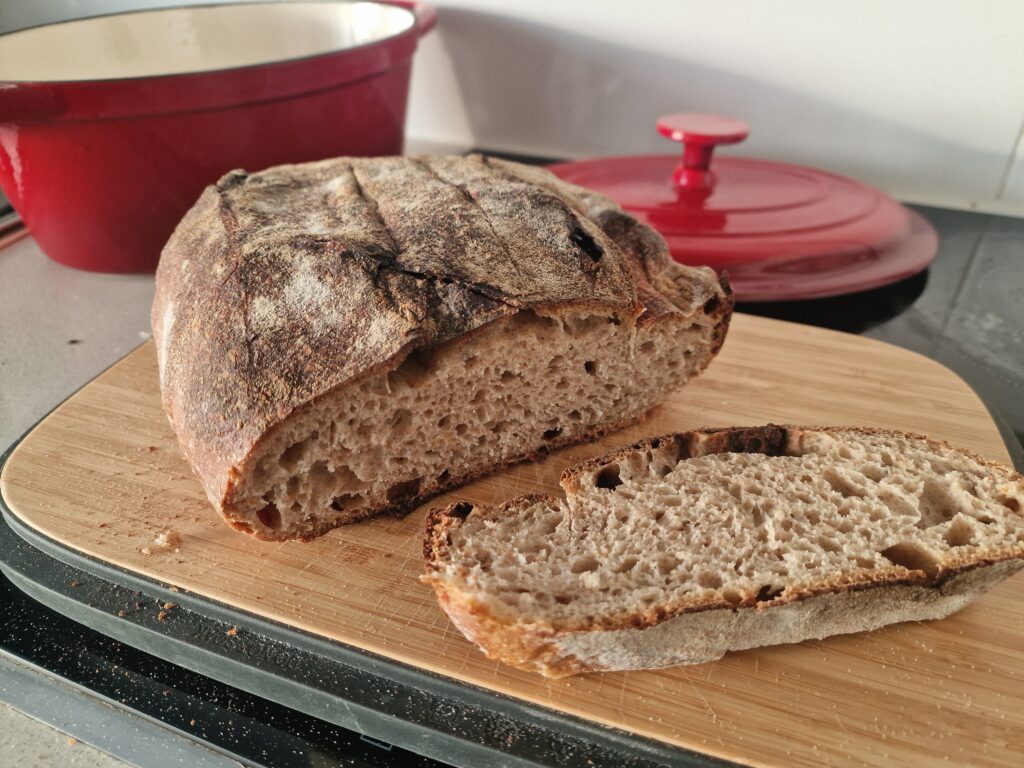
Comparing the Two Loaves
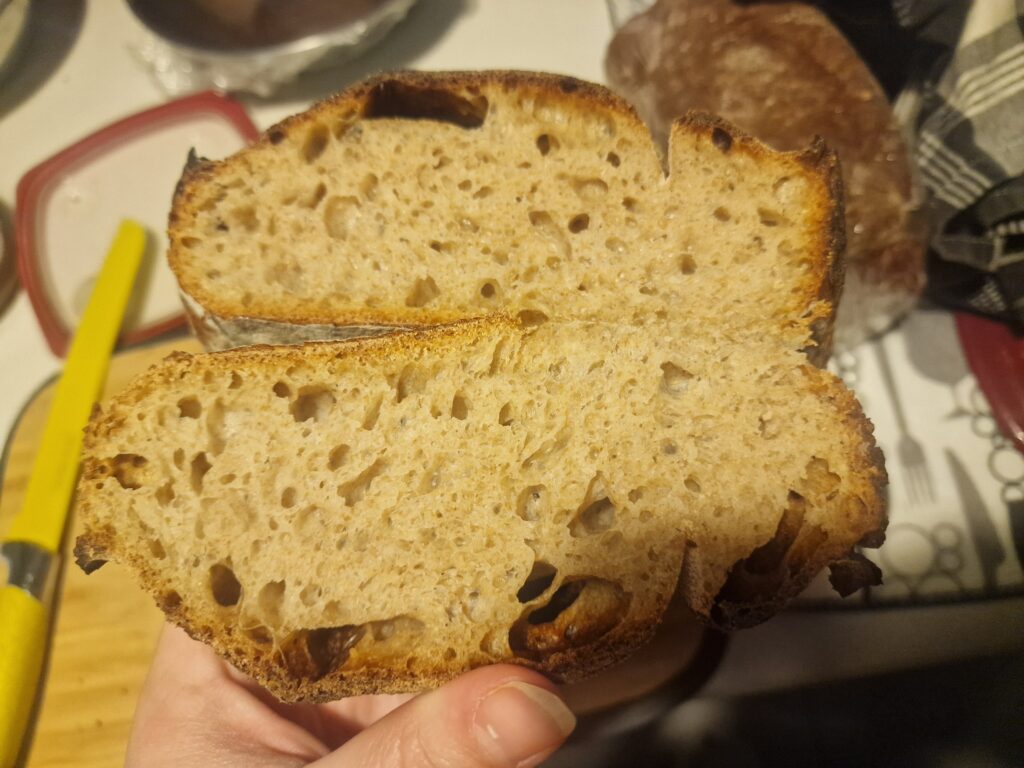
The main difference between the two loaves was that the one that had more proofing time in the fridge came out fluffier, with larger air pockets inside. This made me wonder what would happen if I left the dough in the fridge for an extra day. That’s something I’d like to test in the future!
Creating My Sourdough Starter
For those interested in making their own homemade sourdough bread recipe, here’s the exact process I followed:
Day 1:
- Mixed 100g of whole wheat flour with 100g of filtered water.
- Left it in a plastic container with the lid slightly open at room temperature.
Day 2:
- Added another 100g of whole wheat flour and 100g of filtered water.
- Mixed and left it on the counter for another 24 hours.
Day 3:
- Discarded half of the starter to maintain a manageable amount.
- Added 100g of flour and 100g of water.
- Experimented by switching from whole wheat to white flour to see how it affected the activity.
Day 4:
- No visible activity, but I stayed persistent.
- Fed it again with 100g of whole wheat flour and 100g of filtered water.
Day 5:
- Noticed a major breakthrough—the unpleasant smell from Day 4 was gone!
- The starter began to develop a classic sourdough scent.
- Fed it with white flour this time and left it on the counter.
Day 6:
- The starter doubled in size within hours of feeding.
- Performed the float test—it passed!
- Decided to bake my first loaves using 200g of starter.
The Homemade Sourdough Bread Recipe
For two loaves of homemade sourdough bread, I used the following ingredients:
- 600g white flour
- 400g whole wheat flour
- 200g active sourdough starter
- 800ml filtered water (750ml added initially, with 50ml added later during mixing)
- 20g salt
I followed the 80% hydration rule, meaning for every 100g of flour, I used 80g of water. The result? Two beautiful, naturally fermented loaves—no preservatives, no additives, just simple, wholesome ingredients.
What I Learned & Future Experiments
- Proofing Time Matters: The loaf that stayed in the fridge longer turned out lighter and airier. I want to test an even longer proofing time to see how it affects the final texture.
- Starter Development Takes Patience: There were moments when I thought my starter wasn’t working, but persistence paid off. The shift in smell and rise on Day 5 was a major indicator of success.
- Homemade Bread is Superior: This experiment made me realize that baking my own bread not only gives me control over the ingredients but also results in a fresher, tastier loaf than anything store-bought.
I’m excited to continue this homemade sourdough bread recipe journey, experimenting with different flours, fermentation times, and hydration levels. If you’ve been thinking about trying sourdough baking, I highly recommend giving it a go—it’s a rewarding and delicious experience!
If you would like to discover other delicious recipes, head to the recipes section and try something new.
